Adress book
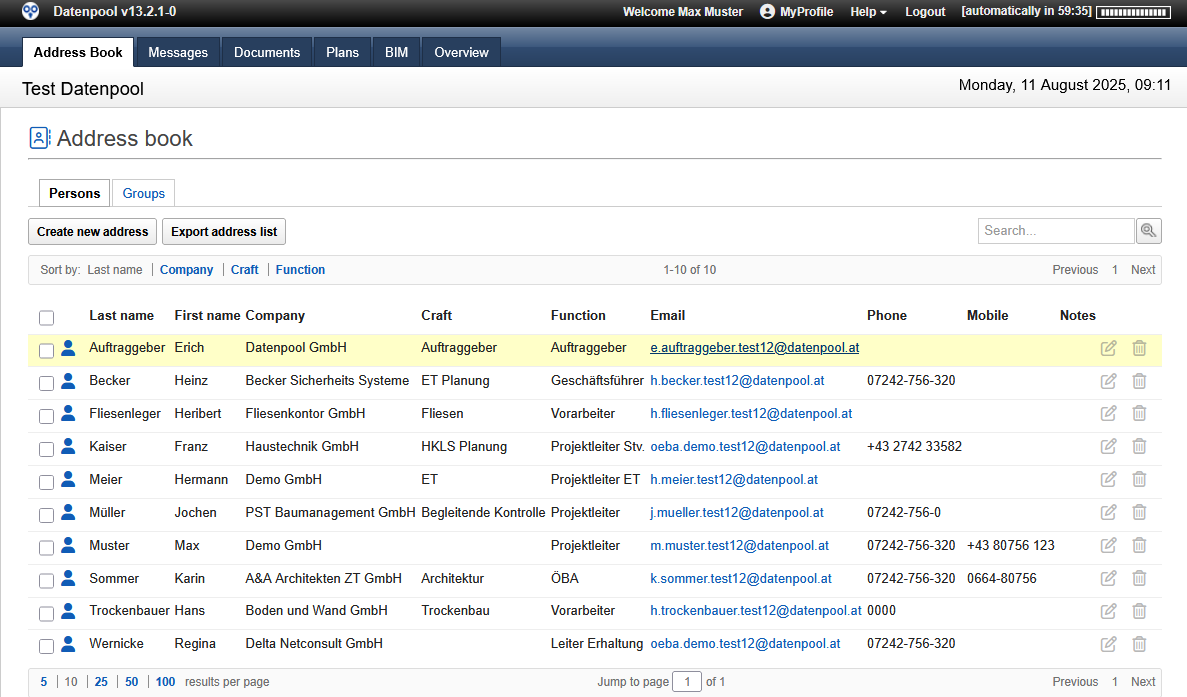
The data pool provides a simple address book that provides an overview of all the people involved in the project and provides the most important contact details. All persons with their own account are automatically listed in the address book, and every user also has the option of adding further addresses to the address book. The right to create new addresses and address groups can be restricted by the project management.
 |
|---|
The following functions are available in the address book:
- Create New Address:
- This button can be used to create a new address if you have the necessary rights.
- Export Address List:
- The function offers the possibility to export all addresses as a Microsoft Excel file. After confirming the security prompt, the download of the address list is started.
- Search:
- The search field can be used to search for any name or designation. With a
"*"as a placeholder, parts of words are also searched. All addresses that contain the searched term are displayed in the result.
- The search field can be used to search for any name or designation. With a
- Email:
- By clicking on an e-mail address, a new e-mail is created and the selected address is entered as the recipient.
- Edit address entry:
- Click on the icon to open the address for editing. You can also edit addresses created by other users.
- Delete address entry:
- Click on the icon to delete the address. You can only delete the addresses that you have created yourself.
- Data pool participants:
- All persons who have an account in the data pool as project participants are marked by a blue symbol on the left edge of the view. The entries of the data pool participants cannot be edited or deleted.
- Personal Contact:
- Address entries that have been marked as personal contact are marked by a green icon on the left edge of the view.
- Create a new group:
- A new address group can be created in the "Groups" tab if you have the necessary rights. Newly created address groups can only be used to send e-mails and are not available as authorization groups for documents.
The addresses are sorted by the system according to the family name. Alternatively, by clicking on the designations in the header of the address area, you can sort by company,trade or function in order to find the desired person more quickly.
Add a new address
All people who have an account in the current project are automatically displayed in the address book. In addition, addresses of external persons can be created, which can be selected when creating new emails. The right to create new addresses and address groups can be restricted by the project management.
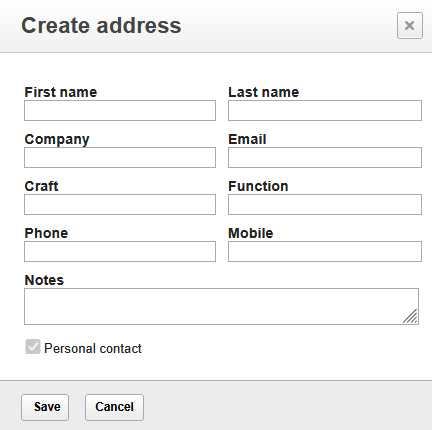
To add an address to the address book:
- Go to the "Address book" and click on the "Create a new address“
- In the dialog box, fill in the address information fields. The storage of the address data is only possible if all default fields have been filled. The "Notes" field can be optionally filled
- Select the "Personal contact" if you don't want the address to be available to other users.
- Confirm the entry by clicking on the "Save“. The new address is saved and added to the address book.
 |
|---|
While saving a new address, the system checks whether an entry with the same e-mail address has already been created in the address book. If the specified email address already exists, the new entry cannot be saved.
New address entries can also be created directly from an incoming or sent email. To create a new address entry, click the Address Book icon in the Inbox. If there are several e-mail addresses in the selected message, the desired e-mail address must be selected in a dialog box.
Adding a New Address Group
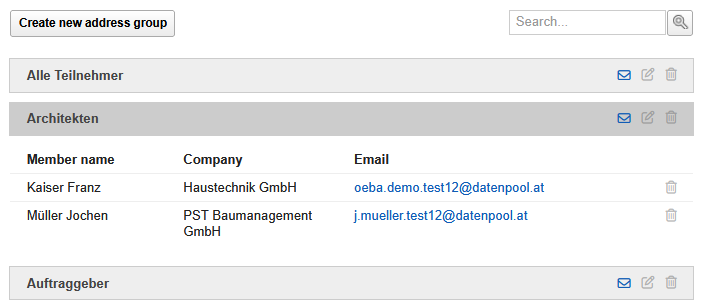
The "Groups" tab provides an overview of all groups of people available in the current project. A distinction is made between authorization groups and address groups. While address groups can only be used to send e-mails, access to documents is also controlled via authorization groups that can only be created by the administration.
 |
|---|
To add an address to the address book:
- Go to the "Address book" and click on the "Groups" subtab. Using the "Create a new group", an address group can be created there for use in e-mail traffic.
- In the dialog box, enter the group name. A short description of the group can be added in the "Notes" field.
- Confirm the entry by clicking on the "Save“. The new group is saved and added to the address book.
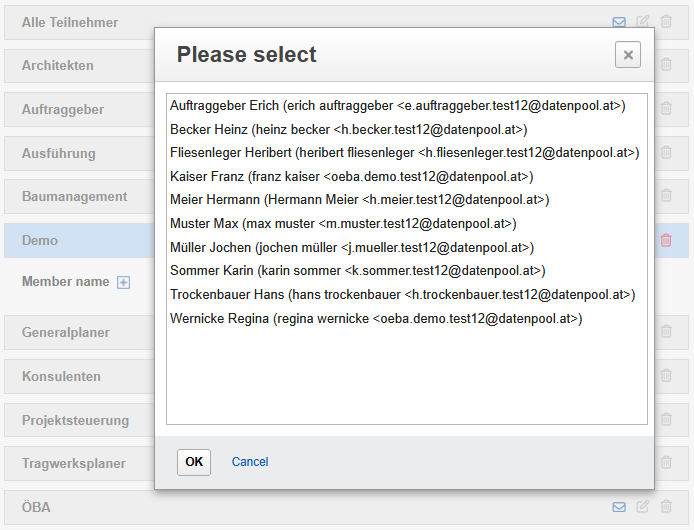
- Open the group and click the plus of the "Member Name" column label to add a person to the group.
- In the list of all project participants, select the people you want to add to the group. By pressing the "Control key" several entries can be selected.
- Complete the selection by clicking on the "OK" button, the selected persons will be transferred to the group.
Dialog box for creating a new address group:
 |
|---|
 |
|---|
The persons in an address group can be edited or added later. To edit an address group, select the "Edit Group" icon in the header of the group, and in the next step you can add or delete people.
If the address group is no longer needed, it can be deleted by selecting the "Remove group" icon.
To write a new message to everyone in a group, you can click on the "Send message to group" icon in the header of the group. The system creates a new message in your mailbox and adds the selected group as the recipient.
Export addresses
The addresses from the address book can be exported as an Excel list in order to edit them as a list or send them as an attachment. In addition to a complete list with all addresses, individual address lines can also be marked that are to be exported.
 |
|---|
To export addresses from the address book:
- Go to the Address Book tab and select all the addresses you want to export in the view. To create an address list with all addresses, no entries need to be marked.
- Click the Export Address List button and choose from the pulldown menu of the dialog box whether to create a list of the selected addresses or all of them.
- Confirm the selection by clicking on the "Export" button. The address list is created by the system and made available for download as an Excel list.
 |
|---|
To be able to mark the desired entries for address export even if you have a large number of addresses, expand the number of lines displayed in the footer of the address range. To create an address list with all addresses, no entries need to be marked.